Ubuntuにnginxをインストールしてウェブサーバーを立ち上げる

Ubuntuにnginxをインストール
アプリケーションをインストールする前におまじない。※初めて実行する場合は、時間がかかります。
$ sudo apt-get update
$ sudo apt-get upgrade
次のコマンドでnginxをインストールします。
$ sudo apt install nginx次のコマンドでnginxがインストールできたか確認します。
$ nginx -v
nginx version: nginx/1.18.0 (Ubuntu)
nginxの起動
nginxのインストール完了と同時にウェブサーバーは自動で立ち上ります。
$ sudo systemctl status nginx
● nginx.service - A high performance web server and a reverse proxy server
     Loaded: loaded (/lib/systemd/system/nginx.service; enabled; vendor preset: enabled)
     Active: active (running) since Thu 2022-10-20 15:15:44 JST; 53s ago
       Docs: man:nginx(8)
    Process: 36839 ExecStartPre=/usr/sbin/nginx -t -q -g daemon on; master_process on; (code=exited, status=0/SUCCESS)
    Process: 36840 ExecStart=/usr/sbin/nginx -g daemon on; master_process on; (code=exited, status=0/SUCCESS)
   Main PID: 36934 (nginx)
      Tasks: 3 (limit: 1033)
     Memory: 7.0M
        CPU: 40ms
     CGroup: /system.slice/nginx.service
             ├─36934 "nginx: master process /usr/sbin/nginx -g daemon on; master_process on;"
             ├─36937 "nginx: worker process" "" "" "" "" "" "" "" "" "" "" "" "" "" "" "" "" "" "" "" "" "" "" "" "" >
             └─36938 "nginx: worker process" "" "" "" "" "" "" "" "" "" "" "" "" "" "" "" "" "" "" "" "" "" "" "" "" >

Oct 20 15:15:44 tk2-121-61239 systemd[1]: Starting A high performance web server and a reverse proxy server...
Oct 20 15:15:44 tk2-121-61239 systemd[1]: Started A high performance web server and a reverse proxy server.
自動起動設定
次のコマンドは、nginxの自動起動設定です。
$ sudo systemctl start nginx
$ sudo systemctl enable nginx
自動起動の解除
次のコマンドは、nginxの自動起動の解除です。
$ sudo systemctl stop nginx
$ sudo systemctl disable nginx
ウェブサーバーへアクセスできるか確認する
レンタルサーバーでパケットフィルターを利用している場合は、Webに使う80/443ポートのアクセスを許可します。
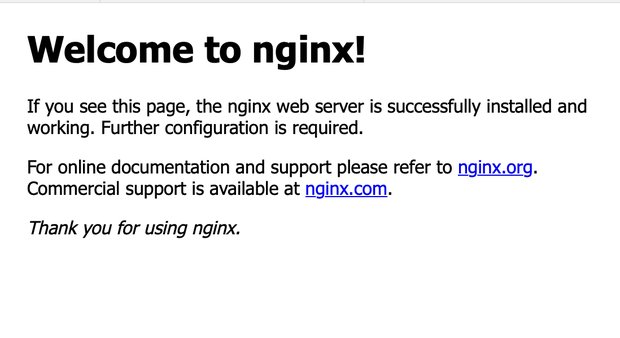
ここまでの設定で問題なければ、ブラウザからサーバーのIPアドレスへアクセスしましょう。次の画像の通り、nginxのスタート画面が表示されるはずです。
nginxのドキュメントルートの変更
nginxのドキュメントルートを変更するには default ファイルを書き換えます。
$ sudo vi /etc/nginx/sites-enabled/default# root /var/www/html;
root /home/ubuntu/kitchen-note.fun/output;設定ファイルを書き換えたら、nginxを再起動させて設定内容を反映させます。
$ sudo systemctl restart nginxWebドキュメントをubuntuのホームディレクトリ配下にする場合、/home/ubuntu ディレクトリの権限を755に設定しないとnginxがアクセスできないので注意が必要です。
wwwありとなしを統一する
まず大前提として、お使いのネームサーバー(DNS)でwwwのサブドメインを追加します。

wwwありとなしを統一する場合には簡単です。/etc/nginx/sites-enabled/default の設定に以下を追記します。
server {
    server_name www.k.inoto.jp;
    return 301 $scheme://k.inoto.jp$request_uri;
}
wwwでアクセスされたものは、wwwなしのドメインに301でリダイレクトされます。
ただし、Let's Encryptを使ったhttpsによるwwwサブドメインの転送を行いたい場合はちょっと複雑になります。こちらに関しましては、解決方法を次の記事の後半に書きました。


