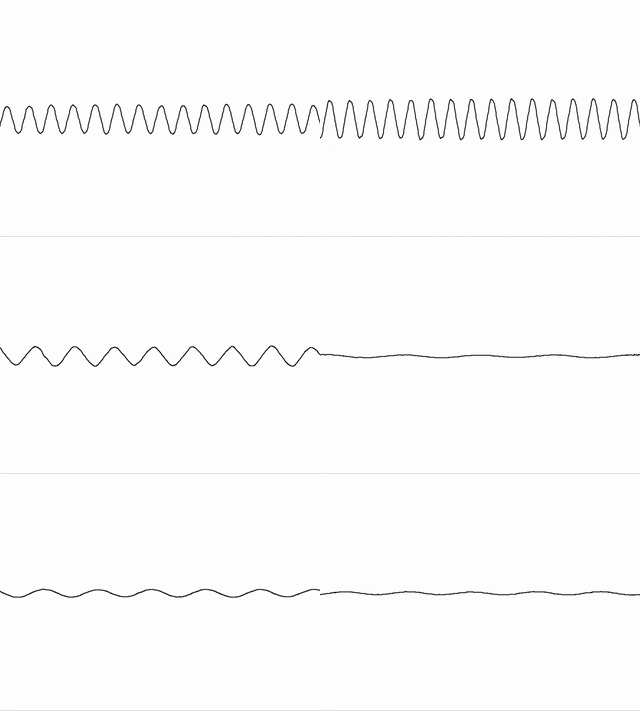
ProcessingでMacのマイク入力を扱う
こんなこと、やります。
- ProcessingからMacのマイク入力アクセスへのセキュリティ許可設定
- Processingでマイク入力に合わせた、さまざまなアニメーション
- 音声データの波形表示
- FFTで周波数特性のリアルタイム表示
つかうもの
この記事でつかうものを説明します。
Processing
Processingをまだお持ちでない方は、 Processing.org からインストールしてください。 こちらでは、macOS上でProcessingバージョン3.4.5を動かしてます。 Processingでの図形描画などのやり方は説明いたしませんので、基礎的な技術は習得してください。
ProcessingのSoundライブラリのインストール
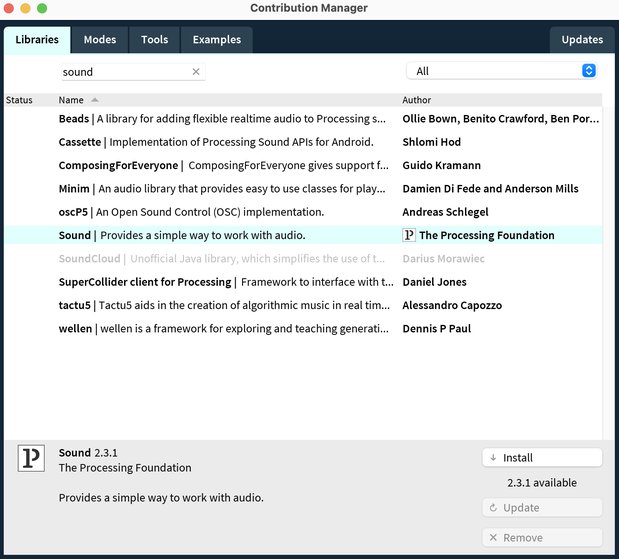
Processingでマイク入力を扱うために、Soundライブラリのインストールを行います。
Processingのメニューから「Sketch」→「Import Library」→「Add Library」へとすすみます。
そこで「sound」で検索し、「The Processing Foundation」のSoundライブラリをインストールします。
マイク入力アクセスへのセキュリティ許可設定
ProcessingからMacのマイク入力へアクセスできるように、セキュリティ許可設定をおこないます。
Processingでマイク入力を使ってみよう
macOSではデフォルトで、Processingから内蔵マイクへアクセスできません。Processingでマイク入力をつかえるように設定しましょう。
やること
Preferenceアプリで「Security & Privacy」→「Privacy」→「Microphone」を表示します。すると次のように、Processingの項目がありませんでした。
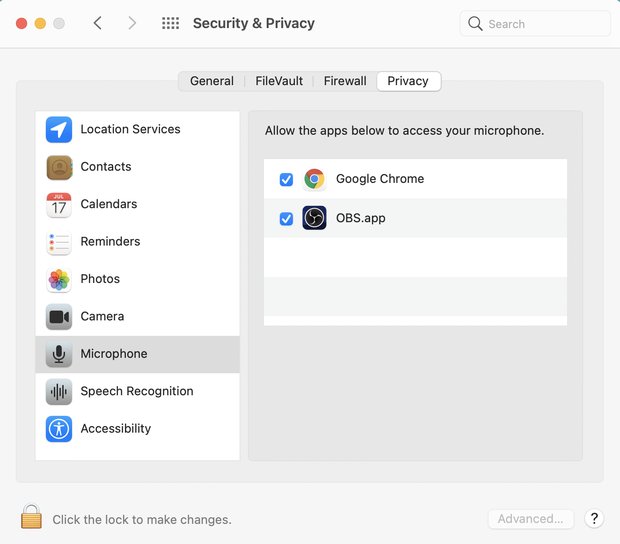
Processingをここへ追加するため、次の作業をおこないます。
作業
ターミナルからProcessingを実行します。
$ /Applications/Processing.app/Contents/MacOS/Processingすると、マイクへのアクセスを許可するアラートが表示されます。「OK」を押して許可します。
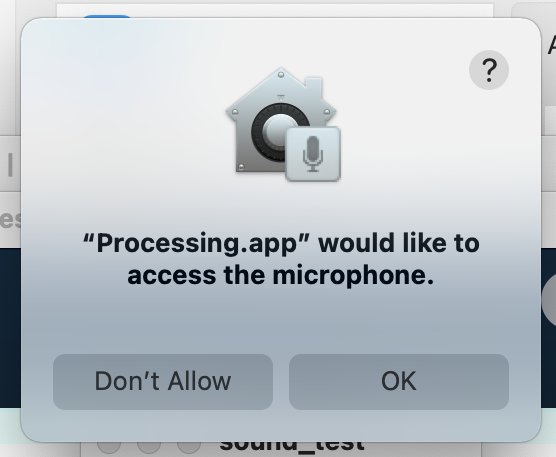
プライバシーにProcessingが追加され、Processingでマイク入力を扱えるようになりました。
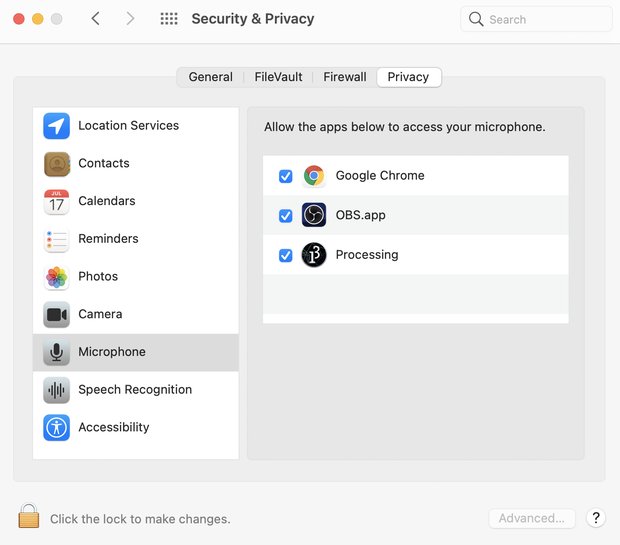
以降、ターミナル経由でProcessingを立ち上げなくても大丈夫です。
さきほどの「マイク入力から音量を取得してみる」プログラムを再度実行して、マイク入力から音量を取得できるか試してみてください。
Processingでマイク入力を使ってみよう
それでは、macOSのマイク入力をProcessingで扱ってみましょう。
マイク入力から音量を取得してみる
まずは、マイク入力から音量を取得して、値を標準出力してみます。
ソースコード
import processing.sound.*;

AudioIn in;
Amplitude amp;

void setup() {
  in = new AudioIn(this);
  in.start();

  amp = new Amplitude(this);
  amp.input(in);
}

void draw() {
  background(255);

  float a = amp.analyze();
  if(a > 0) {
    println(a);
  }

}音量に合わせて円を描くアニメーション
さきほど取得した音量にあわせて、円が大きくなるアニメーションを作ってみます。
ソースコード
import processing.sound.*;

AudioIn in;
Amplitude amp;

void setup() {
  size(400, 300);
  strokeWeight(0);
  background(255);
  frameRate(90);

  in = new AudioIn(this);
  in.start();

  amp = new Amplitude(this);
  amp.input(in);
}

void draw() {
  background(255);

  float a = amp.analyze();
  fill(#ff6347);
  circle(width/2, height/2, 1000*a);

}
音量に合わせて縦棒が伸びるアニメーション
サウンドメーターとして一般的な、音量に合わせて縦棒が伸びるアニメーションを作ってみました。
ソースコード
import processing.sound.*;

AudioIn in;
Amplitude amp;
float peakDetector;

void setup() {
  size(400, 300);
  strokeWeight(0);
  background(255);
  frameRate(90);

  in = new AudioIn(this);
  in.start();

  amp = new Amplitude(this);
  amp.input(in);
}

void draw() {
  background(255);

  float a = amp.analyze();
  displayBar(a);
}

void displayBar(float a) {
  background(255);
  fill(#00ced1);
  float h = 5000 * a;
  float w = 50;
  float marginBottom = 10;
  rect(width/2 - w/2, height - marginBottom - h, w, h);
}
ピークホールド付きアニメーション
さきほどのサウンドメータに、さらにピークホールドをつけてみました。
ピークホールドとは、最大音量を一定時間保持するものです。

ソースコード
import processing.sound.*;

AudioIn in;
Amplitude amp;
float peakDetector = 0;
int limitTime = 90;
int countTime = 0;

void setup() {
  size(400, 300);
  strokeWeight(0);
  background(255);
  frameRate(90);

  in = new AudioIn(this);
  in.start();

  amp = new Amplitude(this);
  amp.input(in);
}

void draw() {
  background(255);

  float a = amp.analyze();
  if(a > peakDetector && countTime <= limitTime) {
    peakDetector = a;
    countTime = 0;
  } else if (countTime > limitTime) {
    peakDetector = 0;
    countTime = 0;
  }
  countTime += 1;
  int alpha = (int) (255 * (1.0 - float(countTime) / float(limitTime)));
  //println(alpha);
  displayBar(a, peakDetector, alpha);
}

void displayBar(float a, float peak, float alpha) {
  background(255);
  noStroke();
  fill(208, 208, 208);
  float h = 800 * a;
  float w = 50;
  float marginBottom = 10;
  rect(width/2 - w/2, height - marginBottom - h, w, h);

  float peak_h = height - marginBottom - 800 * peak;
  fill(255, 102, 102, alpha);
  rect(width/2 - w/2, peak_h, w, 3);

}
マイク入力の波形を表示
オシロスコープのように、マイク入力の音声データの波形を描くアニメーションです。
ソースコード
import processing.sound.*;

AudioIn in;
Amplitude amp;
Waveform waveform;

int samples = 1024;

void setup() {
  size(400, 300);
  strokeWeight(0);
  background(255);
  frameRate(90);

  in = new AudioIn(this);
  in.start();

  waveform = new Waveform(this, samples);
  waveform.input(in);
}

void draw() {
  background(255);
  stroke(0);
  strokeWeight(2);
  noFill();

  waveform.analyze();

  beginShape();
  for(int i = 0; i < samples; i++)
  {
    vertex(
      map(i, 0, samples, 0, width),
      map(waveform.data[i], -1, 1, 0, height)
    );
  }
  endShape();
}
サンプル数
samples変数では、一度に描くサンプル数を設定できます。map関数
map関数は、数値を現在のスケールから別のスケールへ変換します。
map(変換したい数値, 現在の範囲の下限, 現在の範囲の上限, 変換後の範囲の下限, 変換後の範囲の上限)FFTで周波数特性をリアルタイムで表示
FFTで周波数特性をリアルタイムで表示します。
ただし、周波数はリニアスケールですので、音声データですと見づらいです。対数スケールに変換できればいいのですが、簡単にはいかなそうです。

ソースコード
import processing.sound.*;

FFT fft;
AudioIn in;
int bands = 128;
float[] spectrum = new float[bands];

void setup() {
  size(400, 300);
  background(255);

  fft = new FFT(this, bands);
  in = new AudioIn(this, 0);

  in.start();

  fft.input(in);
}

void draw() {
  background(255);
  noStroke();
  fill(208, 208, 208);

  fft.analyze(spectrum);
  float bar_w = width / bands;
  float margin = 10;
  float start_h = height - margin;

  for(int i = 0; i < bands; i++){
    float bar_h = height * spectrum[i] * 10;
    rect(bar_w*i + margin, start_h, bar_w, -bar_h);
  }
}


