【Python】OpenCVで図形の描画からアニメーションまで【線・四角・丸・塗りつぶし】

この記事では、PythonでOpenCVを使って図形を描画する方法をご紹介します。線をはじめ、四角や丸、多角形、塗りつぶしといったことから、図形を動かすアニメーションのやり方までお伝えしていきます。記事の最後ではProcessingでやるようなジェネラティブアートにも挑戦してみましたので、最後までお楽しみください。
はじめに
ここではPython3.xでOpenCVを扱います。
$ pip list | grep opencv
opencv-contrib-python                             4.6.0.66
opencv-python                                     4.5.5.62
なければpipでOpenCVをインストールしてください。numpyも使います。
$ pip install opencv-python
$ pip install opencv-contrib-python
$ pip install numpy
他にもPython x OpenCVに関する記事を書いてます。


OpenCVで色々な図形を描画
ラインを引く
OpenCVでラインを引く例です:
import cv2
import numpy as np

canvas = np.zeros((300, 300, 3), dtype="uint8")

color = (0, 255, 128)
cv2.line(canvas, (0, 0), (300, 300), color)
cv2.line(canvas, (300, 0), (0, 300), color, thickness=5)
cv2.line(canvas, (0, 150), (300, 150), color, thickness=1, lineType=cv2.LINE_8)

cv2.imshow("Canvas", canvas)
cv2.imwrite('../canvas_line.jpg', canvas)

cv2.waitKey(0) # Press Esc to close window
実行結果が次になります。

図形を描く(四角、丸、楕円)
OpenCVで四角、丸、楕円などの図形を描く例です:
import cv2
import numpy as np

canvas = np.zeros((300, 300, 3), dtype="uint8")

color = (0, 255, 128)

# rectangle(img, pt1, pt2, color, thickness)
cv2.rectangle(canvas, (30,20), (100,80), color, 1)
cv2.rectangle(canvas, (170,20), (200,100), color, -1) # Set -1 or cv.FILLED to thickness is fill

# circle(img, center, radius, color, thickness)
cv2.circle(canvas,(100,200), 50, color, 1)

# ellipse(img, center, axes, angle, startAngle, endAngle, color, thickness)
cv2.ellipse(canvas, (220,220), (80,30), 45, 0, 330, 255, cv2.FILLED)

cv2.imshow("Canvas", canvas)
cv2.imwrite('../canvas_shape.jpg', canvas)

cv2.waitKey(0) # Press Esc to close window
実行結果が次になります。
")
ポリゴン(多角形)
OpenCVで多角形を描く例です:
import cv2
import numpy as np

canvas = np.zeros((300, 300, 3), dtype="uint8")

color = (0, 255, 128)

pts1 = np.array([[10,10],[50,10],[100,50],[50,200],[10,180]], np.int32) # vertices
# polylines(img, pts, isClosed, color, thickness)
cv2.polylines(canvas, [pts1], True, color, 1) # thickness=-1 does not work (use cv2.fillPoly)

# fillPoly(img, pts, color)
pts2 = np.array([[150,10],[200,10],[220,80],[150,130]], np.int32)
cv2.fillPoly(canvas, [pts2], 255)

pts3 = np.array([[150,150],[180,170],[220,250],[290,290]], np.int32)
cv2.polylines(canvas, [pts3], False, color, 1)

cv2.imshow("Canvas", canvas)
cv2.imwrite('../canvas_polygon.jpg', canvas)

cv2.waitKey(0) # Press Esc to close window
実行結果が次になります。
")
ポリゴンを塗りつぶしたい場合は cv2.polylines ではなく cv2.fillPoly を使います。
テキストの描画
OpenCVでテキストを描く例です:
import cv2
import numpy as np
from PIL import Image,ImageFont,ImageDraw

canvas = np.zeros((300, 300, 3), dtype="uint8")

color = (255, 255, 255)

font_en = cv2.FONT_HERSHEY_SIMPLEX
# putText(img, text, org, fontFace, fontScale, color, thicknes, lineType, bottomLeftOrigin)
cv2.putText(canvas, 'Hello world', (30, 60), font_en, 1, color, 1, cv2.LINE_AA)

"""
Draw Japanese text with PIL
"""
font_ja = ImageFont.truetype("/Users/mopipico/Library/Fonts/yawarakadragon.otf", 25)

img = Image.fromarray(canvas[:, :, ::-1]) # OpenCV to PIL
draw = ImageDraw.Draw(img)

draw.text((30, 150), 'こんにちは、世界!', font=font_ja, fill=color)

canvas = np.array(np.array(img, dtype="uint8"))[:, :, ::-1] # PIL to OpenCV

cv2.imshow("Canvas", canvas)
cv2.imwrite('../canvas_text.jpg', canvas)

cv2.waitKey(0) # Press Esc to close window
実行結果が次になります。

cv2.putText では、日本語文字を表示できないので、PILを使って描画しました。ただし、OpenCVのcanvas配列とPILのImageオブジェクトの整合性がとれるように配列を変換する必要があります。
PILで文字表示する方法は、次の記事でも詳しく解説してます。

OpenCVでアニメーション(図形を動かしてみよう)
Processingのように図形を動かしてみたい方もいらっしゃるのではないでしょうか?PythonのOpenCVでも図形アニメーションは可能です。
ボールを画面内で跳ね返すアニメーション
OpenCV図形を動かす例です:
import cv2
import numpy as np

def fill(size, color):
    w, h = size
    canvas =  np.zeros((h, w, 3), dtype="uint8")
    cv2.rectangle(canvas, (0,0), (w,h), color, -1)
    return canvas

def main(framesize, frame_max, writer):
    # -------------------------------------------------
    # setup
    # -------------------------------------------------
    width, height = framesize

    frame_counter = 0

    last_pos = (150, 130)
    dx = 6
    dy = 12
    color = (0, 255, 128)
    bg_color =  (128, 128, 128)

    radius = 30

    # -------------------------------------------------
    # loop
    # -------------------------------------------------
    while True:
        if frame_counter > frame_max:
            break

        canvas = fill(framesize, bg_color)

        x = last_pos[0]
        y = last_pos[1]

        if (x+radius/2 > width) or (x-radius/2 < 0):
            dx = -1 * dx
        if (y+radius/2 > height) or (y-radius/2 < 0):
            dy = -1 * dy

        pt = (x+dx, y+dy)
        last_pos = (pt)
        cv2.circle(canvas, pt, radius, color, -1)

        writer.write(canvas)
        cv2.imshow("Canvas", canvas)

        key = cv2.waitKey(5)
        if key == 27: # Esc
            break
        frame_counter += 1

if __name__ == "__main__":
    outpath = '../build/canvas_animation.mp4'

    framesize = (300, 300)
    fps = 30
    frame_max = 4 * fps # 5sec

    fmt = cv2.VideoWriter_fourcc('m', 'p', '4', 'v')
    writer = cv2.VideoWriter(outpath, fmt, fps, framesize) # ライター作成


    main(framesize, frame_max, writer)
    writer.release()
実行結果が次になります。

Processingの setup や loop と同じように考えれば何もむつかしくないです。while文(loop)内でやっていることは、これまでに紹介してきた図形の描画と同じプログラミングです。fill()で背景色付きのcanvasを作って、図形を配置するだけです。その図形の位置を少しずつ動かしていけばアニメーションの完成です。 上記のプログラム例では、canvas領域のはみ出し判定も行なってます。これを発展させれば、図形同士の当たり判定も同じようにしてできるはずです。
ジェネラティブアートっぽいこと
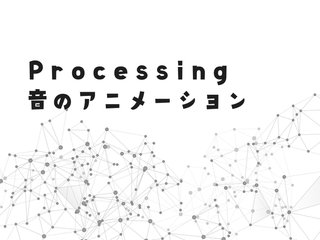
Processingなどのジェネラティブアートでよく見かける「点と点を線で結ぶ」アニメーションの例です:
import cv2
import numpy as np
from numpy.random import *
import itertools

def fill(size, color):
    w, h = size
    canvas =  np.zeros((h, w, 3), dtype="uint8")
    cv2.rectangle(canvas, (0,0), (w,h), color, -1)
    return canvas

def is_nearby(pt1, pt2):
    if (pt1[0] - pt2[0])**2 + (pt1[1] - pt2[1])**2 < 6000:
        return True
    return False

def main(framesize, frame_max, writer):

    # -------------------------------------------------
    # setup
    # -------------------------------------------------
    width, height = framesize

    frame_counter = 0

    radius = 2
    num = 64 # ball len
    max_speed = 3
    last_pts = [(randint(width), randint(height)) for _ in range(num)]
    dpos = np.array([(randint(max_speed * 2), randint(max_speed * 2)) for _ in range(num)]) - 3 # dx, dy

    color = (222, 222, 222)
    bg_color =  (0, 0, 0)

    # -------------------------------------------------
    # loop
    # -------------------------------------------------
    while True:
        if frame_counter > frame_max:
            break

        canvas = fill(framesize, bg_color)

        for i, pt in enumerate(last_pts):
            dx, dy = dpos[i]

            x = pt[0] + dx
            y = pt[1] + dy

            if x>width or x<0:
                dx *= -1
            if y>height or y<0:
                dy *= -1

            cv2.circle(canvas, pt, radius, color, -1)
            last_pts[i] = [x, y]
            dpos[i] = [dx, dy]

        for pair in itertools.combinations(last_pts, 2): # combination
            pt1, pt2 = pair
            if is_nearby(pt1, pt2):
                cv2.line(canvas, pt1, pt2, color)

        writer.write(canvas)
        cv2.imshow("Canvas", canvas)
        if frame_counter == 0:
            cv2.imwrite('../dots_and_lines.png', canvas)

        key = cv2.waitKey(5)
        if key == 27: # Esc
            break
        frame_counter += 1

if __name__ == "__main__":
    outpath = '../build/canvas_animation2.mp4'

    framesize = (600, 400)
    w, h = framesize
    fps = 30
    frame_max = 10 * fps # 5sec

    fmt = cv2.VideoWriter_fourcc('m', 'p', '4', 'v')
    writer = cv2.VideoWriter(outpath, fmt, fps, framesize) # ライター作成


    main(framesize, frame_max, writer)
    writer.release()
実行結果が次になります。

複雑そうに見えますが、それほど難しいプログラミングではありません。ポイントは次のとおりです。
- ランダムで点をcanvas上に配置
- それぞれの点の移動方向速度を用意します。
- 2つの点の組み合わせをitertools.combinationsで作成、
- 点の点の距離を計算します。
- 近ければ点と点を線で結ぶ